What
can you do with your genealogy information once you have it
"completed"? Is there some creative way for you to display what you've
learned? Of course, you know the answer to that is "Yes". There are all
kinds of creative projects to display your family tree information. One
way I like makes a great display for a wall or for a family reunion.
If
I focus my attention on my great-grandparents, Alois Panther and
Elizabeth Dunzinger, I have a massive amount of information on Alois'
ancestors and they had a large number of children, grandchildren,
great-grandchildren etc.
Find
the photo you want to use as the final product. You can use any photo
but it should have meaning to you because this is the overall picture
you will be looking at when you look at your mosaic. I used this
portrait of Alois and Lizzie.

Download and install it, then we can start getting the photos ready.
Keep
in mind that in order to generate a good photomosaic, you need a very
large number of photos. I wouldn't even attempt it without at least one
hundred photos. I generated my photomosaic of Alois and Lizzie Panther
using just over 1,000 photos. I used the documentation images of Alois
and all of his ancestors, along with their siblings, along with all the
photographs of Alois and Lizzie's descendants. The more photos you have
to work with, the better.
Everyone
manages their family tree data and documentation differently. I put all
of my documentation in a folder on my hard drive called "paf". I use the
Personal Ancestral File program put out by the LDS church. They don't
make this available any longer but you should be able to do similar
steps using the program that you use to manage your family tree.
I
went to Alois Panther, went to File, Export, Export to PAF 5.
 Uncheck
all boxes under "Include" except "Multimedia Links" and "Full Information on Living". At the bottom,
under "Selected Individuals", select "Partial" then click the "Select"
button.
Uncheck
all boxes under "Include" except "Multimedia Links" and "Full Information on Living". At the bottom,
under "Selected Individuals", select "Partial" then click the "Select"
button.

From here, I was able to select "Ancestors" under "Relationship
Filter" and click the "Select" button. Then told it to go back down the
tree one generation at each step by entering 1 next to "Descendant
generations".

This selects the siblings of your ancestors in addition to
their parents. You don't have to do this but it does give you more
photos to work with assuming you have their siblings documented. You can
also go further down each branch of the tree if you wish, just by
selecting a larger number at this point. Once you have the number of
generations you want to include, click OK.

Next I selected
"Descendants" and clicked the "Select" button again. I left it at the
default of 10 for number of generations. This means it will select all
of them. Again, the more photos the better but you can chose however
many generations you wish.

Click OK, then click Export.
Select the location to place your file and give it a name, then click the Export button one last time.
Now
open Microsoft Excel or another spreadsheet program. Open the file you
just exported.

Sort the list in alphabetical order and delete all
entries that are not photographs.

Save the file by clicking the save
button.
Next, create a folder on your hard drive to save the files to. I created one called C:\Mosaic.
Start
Notepad and open the file. Go to Edit, Replace. Enter "2 FILE " in the
Find box and enter "copy " in "Replace With", then click "Replace All".

Go back to Edit, Replace. Enter ".jpg" in the Find box and enter
".jpg C:\Mosaic" (or the path to the folder you created) and click "Replace
All".

Here is the resulting file:

Rename the .ged file to instead end with .bat . This file is now a batch file that will copy each of the files found attached to all the individuals you exported into your working image folder. Double-click the file to run the batch file. It can take a few seconds to a minute or so to complete, depending on how many photos you're working with.
Launch Andrea Mosaic. Most likely you'll want to select "Square Tiles".

Select the options you want to use to create your mosaic.

You'll select the overall size of the final image, how many smaller images will make up the larger image, how many dots per inch (the greater the number, the higher the detail in the final result), whether you want to rotate or flip any of the component images. Another option is "Pattern". With "square" selected, you'll have each row of images all lined up perfectly. With "Square (2 rows)" selected, every other row will be off set, much like a wall of bricks is lined up. With "Square (3 rows)" selected, line of squares won't line up for three rows. These options make the final result a bit less blocky.
Click the icon just below "Main Image to reproduce as a Mosaic:" and select your overall final image, then click "Open"


Click "More Options"

The only thing you'll likely want to change here is the Mosaic Directory to tell the program where to save the image file it creates. Select your options, then click OK.
Click the "Tile Images" button.

Click "Add Folder" and browse to the folder you copied your photos to. If you're going to generate a black & white (grayscale) image, put a check mark in the box next to "Black & White".

Click Save List. The program will examine the image files and generate a list.

Click OK.
Click "Create Mosaic" and the mosaic image will be generated. Depending on how large the file is and how many images you use to create it, it will take anywhere from several seconds to a few minutes to complete. When finished, open the folder you saved it to and look at your final result.
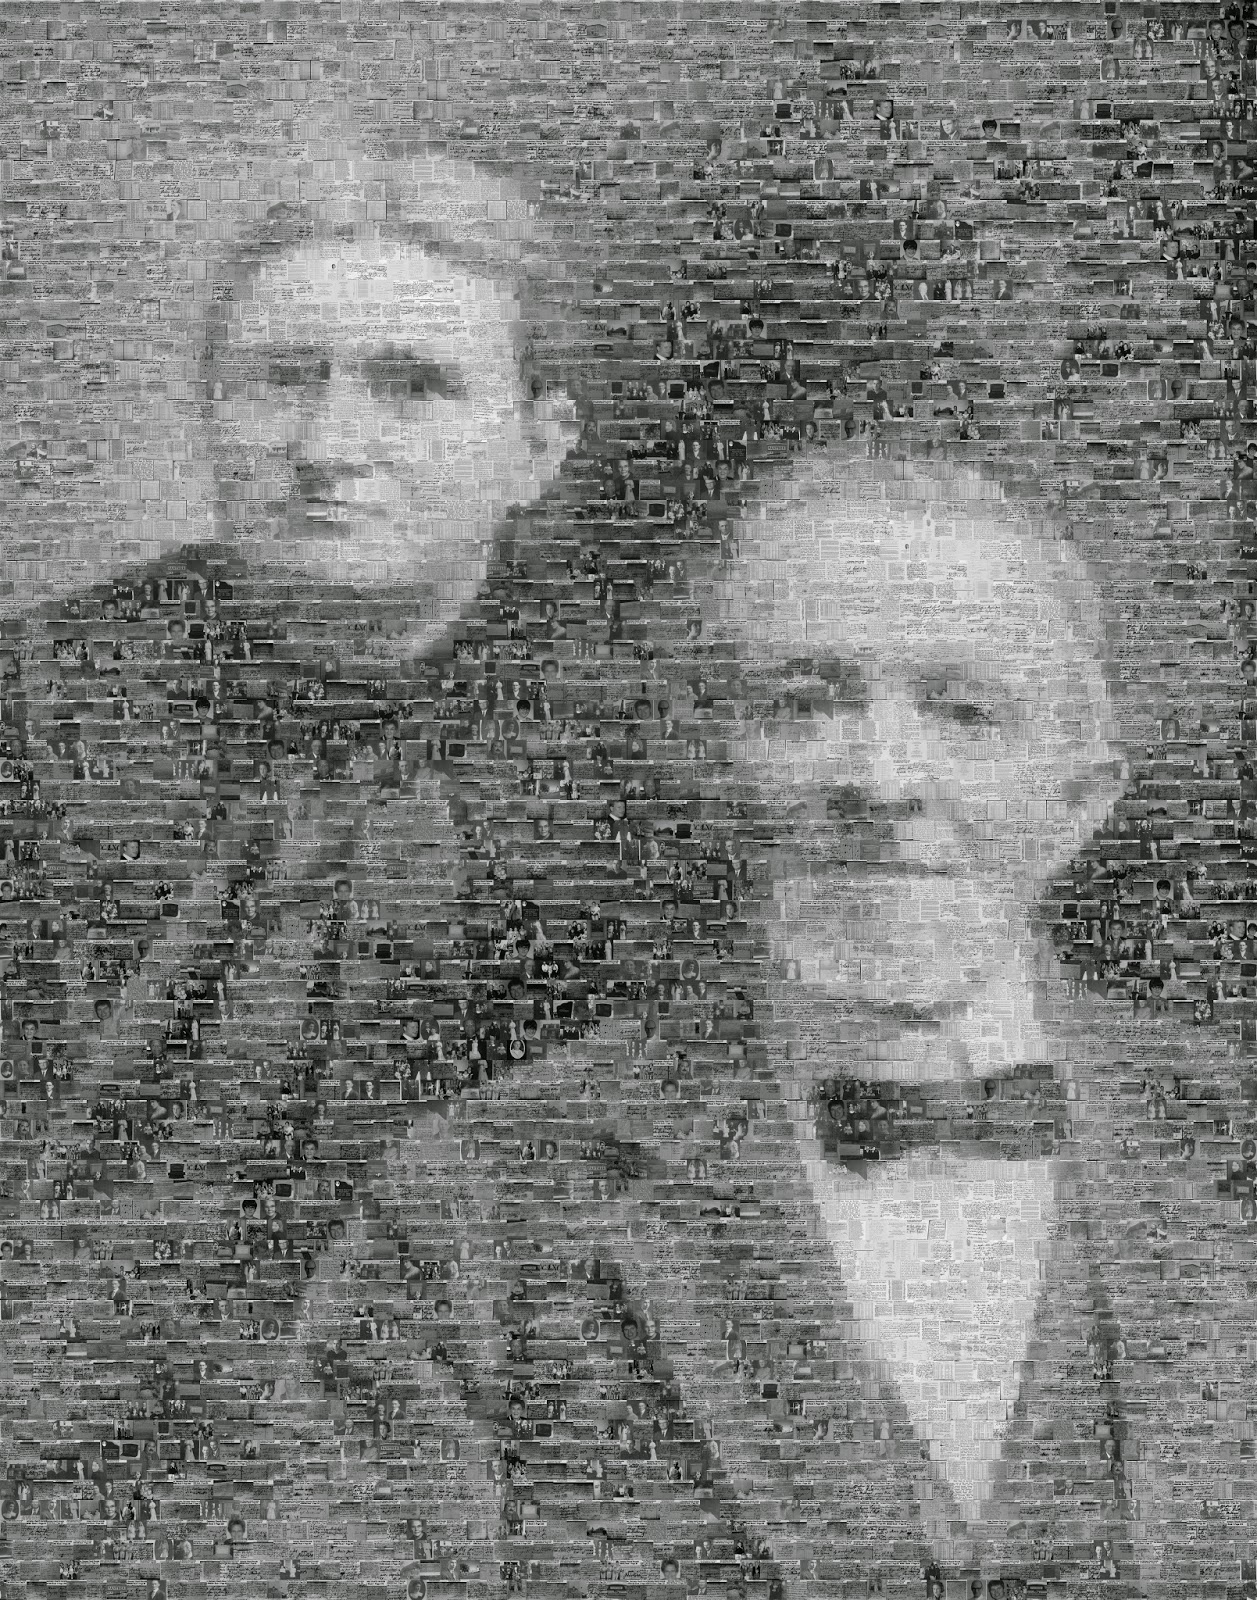 |
| This is the photo mosaic of Alois and Lizzie Dunzinger Panther I created using photos and documents from their life, their ancestors and descendants. |
 |
| I also created a mosaic of Benedict and Elizabeth Menke Panther. |
The file size of these mosaic images will be quite large. It's quite possible the files will be too large to email. These two are definitely too large for me to display on this blog or on Picasa photo sharing web site. They are a large enough file size to print out a photo 3 feet tall in good quality.
This is a great project that you can have printed on basic paper in black & white at Sam's Club or Fed Ex Office Store for relatively little money that you can bring to family reunions or frame and hang on your wall.
I hope you have fun with this!
--Matt
I decided to put the largest image I can display at the very bottom of the blog post to give you a better idea of what it looks like:
Very cool!
ReplyDeleteSee this post http://matthewkmiller.blogspot.com/2015/01/animated-photomosaic-of-ancestor.html for taking this project to the next level by animating it.
ReplyDeleteSo very cool :)
ReplyDelete